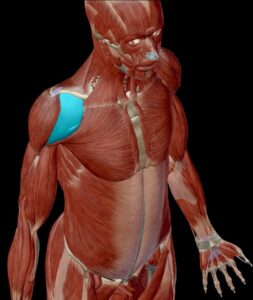


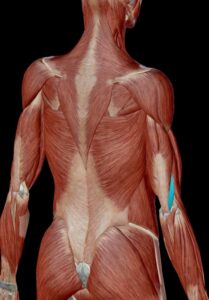
As you can see, there are a lot of muscles involved. Handstand is a very complex exercise, and when you master it, you won’t even think about the flesh, but you will already be upside down, with a big smile on your face. Practice makes perfect.
Beginner’s Mastery Guide
Warm-up
The most important thing to do, before you start your journey to your handstands is to warm up properly. You NEED to warm up your neck, shoulders, wrists and do some kind of dynamic stretching for the shoulder girdle. Always do some light cardio before you start exercising, just to lift the body temperature. Warming up is very much needed, as we function better when we are in working temperatures and are less likely, to get injured. Our bodies resist movement when they are not warmed up.
Your wrists are a key to a proper handstand, so make sure you open them up and stretch them properly. You should also open up your shoulders with simple stretching exercises for your lats. Another great thing to do is an external rotation for your rotator cuff. The best thing to use is a resistance band.


When we are warmed up, our joints lubed up. We can start getting legs up.
But first, let us check some assisting exercises, that will help with the control of our body.
Assisting exercises
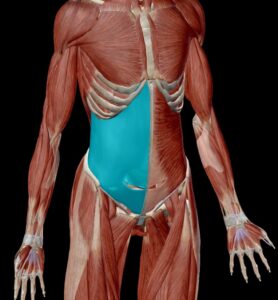
If you are a beginner, intermediate, or even expert on handstands, you should always include some core exercises. The best one for the handstand is the hollow body hold, as it simulates the real handstand, and engages your core, making you more energetic. Eventually, it will be easier for you to maintain a neutral position in a handstand.

If you have trouble with this exercise, you can simply change the leg position. Draw your legs closer to your body and your arms next to your torso, as this will make it easier to hold an isometric contraction of your abdomen.

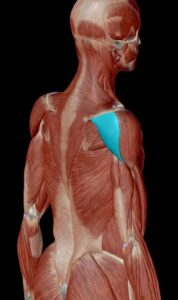
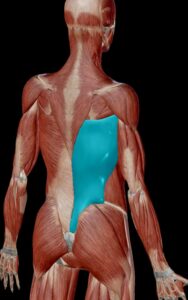
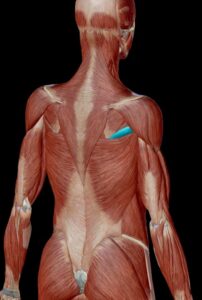
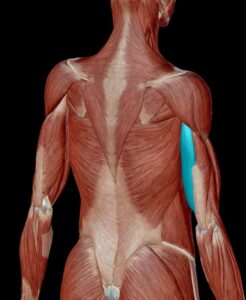
Another great thing to do is improve your back strength, as it will enhance the stabilization of the spine. So any kind of a back row is useful, but if you don’t have gym membership or equipment, start doing pull-ups with different grips. The pronated grip will work more on M. latissimus dorsi, as neutral or supinated, will work more on the trapezius and rhomboid muscles. Both variations are suitable for the development of the back, but if you have issues with bad posture, do standard, close grip pull-ups with a supinated grip. This exercise will help with the retraction of the scapula and, therefore, making your position of scapula much better over time!


If you don’t have the necessary strength for a single pull up, pick up a chair and start at bar height. Lower yourself as slow as you can, and try to resist for 3 seconds, focusing on the eccentric contraction of the back muscles. That can and will help you progress to a single pull up.
And we are back at it again, glutes! Glutes are essential when trying to do a perfect handstand. They should always be engaged, as they stabilize the hip joint and make it easier to hold a handstand in a neutral position. You can check exercises for glutes on my YouTube.
Starting with the basics
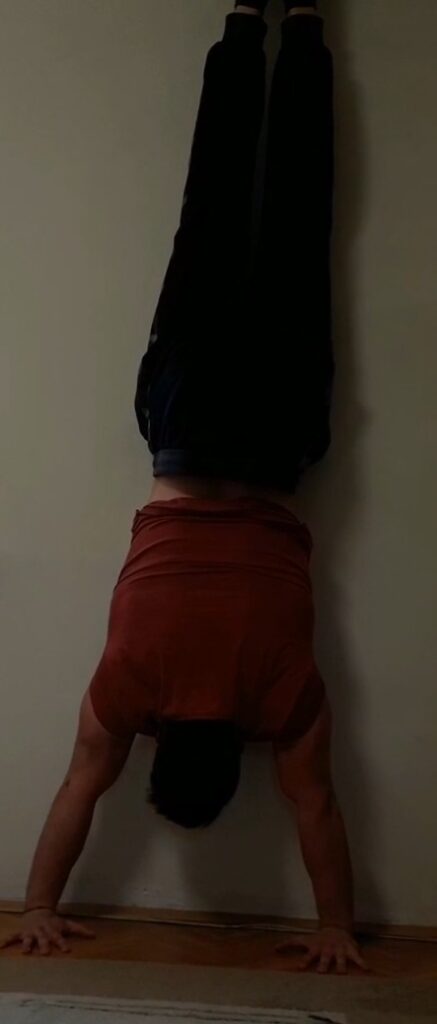
As we are getting closer and closer to handstands, we need to start with the basics to ensure that no one gets injured. Alternatives to handstands are wall stands. As explained in the video, we begin by lifting our legs on a wall, holding on to our arms.
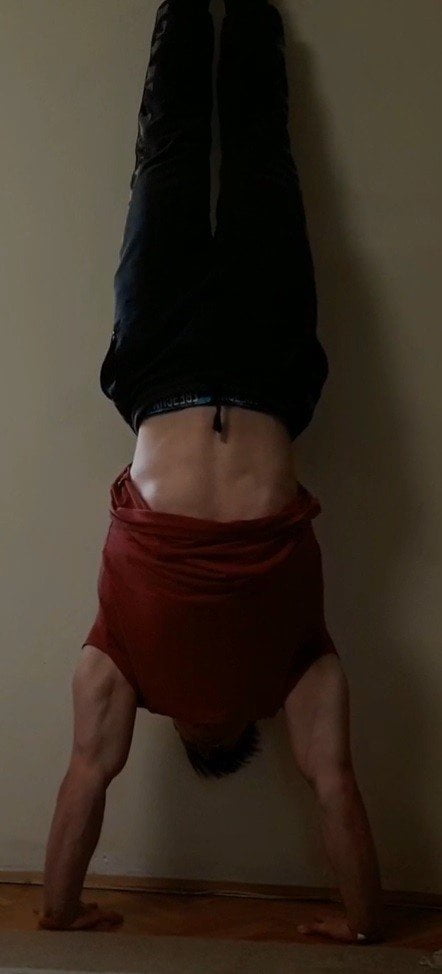
As we feel comfortable, we start to walk with our hands towards the wall, ascending our legs to the ceiling. When our bellies align with the wall, we hold the position. In the end position, we engage our core by pressing the belly button in, squeezing the glutes, and completely stretch our shoulders. Doing this should put us in a neutral position, which we will try to do in a real handstand.
If you don’t feel comfortable with the wall stand position (facing the wall), you can turn around and thrust yourself with your legs towards the wall. You’re back should be aligned with the wall this time. This way, you cant fall backward. Some will find this variation easier.
Performing the perfect handstand
So, you have done it. You are getting more reliable, and you feel at ease while making wall stands. Maybe it’s time for you to try the real thing. First of all, be sure that no one or nothing is around you, that you can fall on or injure yourself. If you are scared of falling, ask a relative or a friend to hold your legs. Put some yoga mats around you, and you should be good to go.
Start with leg kicks to begin the motion and begin the process of learning how to balance in a handstand. Do at least ten repetitions with whichever leg you like.
Then start with your partner holding your legs at the top. ALWAYS try to go through 3 queues.
- Shoulders – Lengthen your shoulders out as much as you can. That will help you maintain balance.
- Glutes – Squeeze your glutes as much as you can. Again stabilization of the hip joint will make it easier to balance. It will also put you in the best, neutral spot for handstands.
- Core – Engage your core by holding the belly button in. That will protect your spine.
Additional one for advanced handstand;
- Fingers – Spread your fingers as much as you can. That will immensely help with the balance of the body. When you think you are going to fall forward, press through your fingers. If your tipping back, push through the middle/lower part of the hand.
When you have mastered this, you can start doing handstands by yourself!
Handstand to frog
If you want to improve with your handstands, you can always challenge yourself with exercises such as frog to handstand/handstand to the frog. Start by holding the frog position only, and then try to push with your shoulders and triceps into a handstand. When you are in a handstand, lower yourself slowly into a frog position. It will help if you lean forward as you descend into the end position. Repeat the exercise as many times as you can. Remember the three queues + 1, and keep practicing.


I hope you found something useful in the perfect handstand article. Remember, variety is key to this exercise. Play with your legs or start practicing a one-arm handstand. The sky is the limit. But most importantly, enjoy it!


Wow! Thank you so much for sharing a great article with us. In fact, your article is very informative and I’ve got a lot of tips about perfect handstand by reading this. After watching this video in your article I understand how to get yourself a strong based by doing a handstand initially. It does many benefits to the human body such as keeping the nervous system cool while increasing immunity. Your article tips will greatly benefit us and we will definitely share our new experiences with you soon. And I will share your article with my friends.
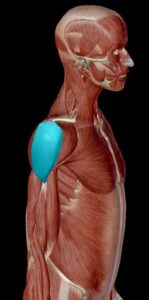
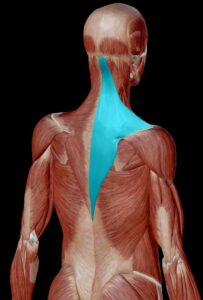
Trapezius is a muscle that with its visual identity gives the impression of power, that is, with a well-developed trapezius muscle, even when it happens when the remaining bodies are average, you will look powerful. The impression of this came from our subconscious where a powerful trapeze protects the head from bumps and sudden movements, primarily protecting the door. When we look at athletes from the categories of martial arts, the first thing we will notice is trapeze.
Not only it is very important in our bodies, It sure is one of the most impressive ones, agreed on =).